The tooth implant procedure. – Part 2.
[ Part 1 of our overview can be found here. ]
Step 8 – Drilling the hole for the implant.
Once the pilot hole has been completed, the dentist will continue the drilling process using a set of bits, each of which has a slightly larger diameter.
As each one is used in turn, the hole will gradually become larger, until it is the correct diameter for the implant that’s been selected.
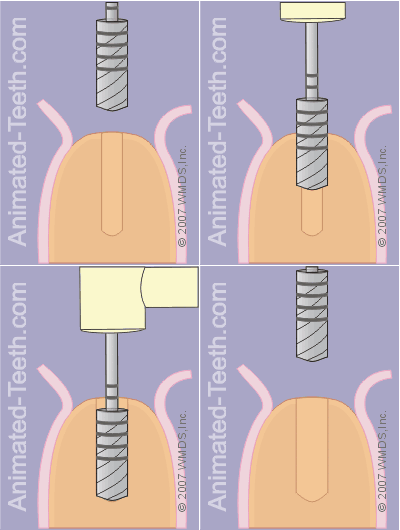
Completing the hole for the implant.
What size implant will be placed?
Larger has advantages.
In general, the dentist will want to select an implant that’s as large as reasonably possible. That’s because longer and larger diameter ones distribute their load to the surrounding bone more favorably than comparatively smaller ones.
Implant sizes.
- Most dental implants that are placed are on the order of 4mm in diameter (around 3/16ths of an inch).
- Some dentists consider a diameter of 3.25mm to be the smallest that can ensure adequate strength.
- Tooth implants greater than 4mm are available but they’re not widely used because sufficient bone width for them is not often available.
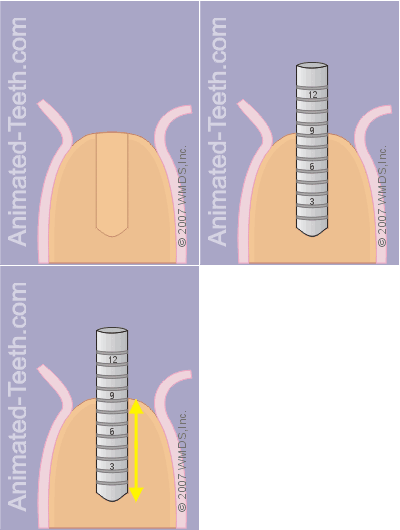
Confirming the dimensions and orientation of the hole.
Step 9 – Double checking the implant’s hole.
Once the hole for the implant has been completed, an alignment pin is placed in it so the dentist can confirm that it meets the needed orientation and depth requirements.
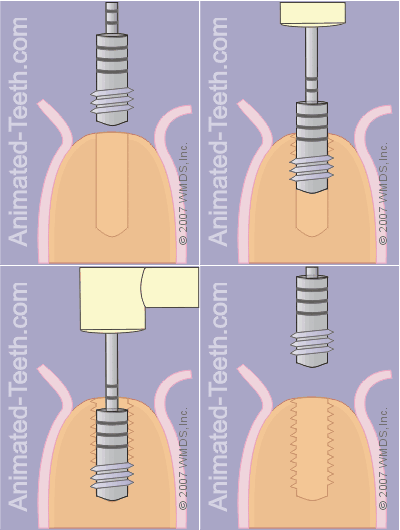
Threading the hole.
Step 10 – The dentist will thread the hole.
Treatment variation – Self-tapping.
As they’re screwed into place, their cutting edge creates the grooves needed for the implant’s threads. No separate threading step is required.
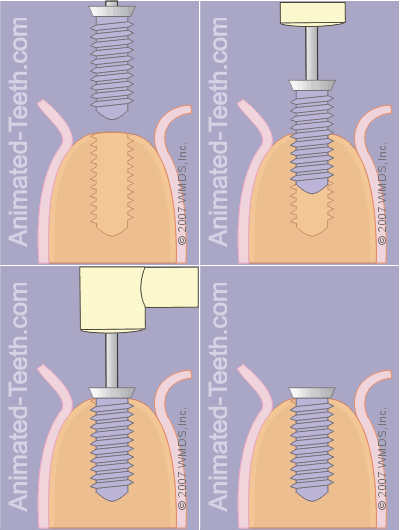
Placing the implant.
Step 11 – The dentist will place the implant.
- Using their dental drill (via a special adapter that holds the implant).
- Manually using a hand wrench, some of which are actually small torque wrenches.
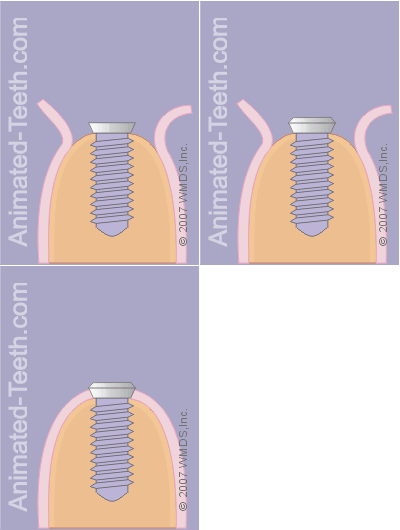
Placing the implant cap. Closing the flaps.
Step 12 – Closing the surgical site.
a) Placing the implant cap.
b) Placing stitches.
They will then trim and shape the two flaps of gum tissue and reposition them back over the patient’s jawbone and around the implant’s healing cap. They will place a few sutures (stitches) to hold the gum tissue in place.
c) Healing times.
The stitches are usually left in place for about seven to ten days. After this time period, the gum tissue will have healed sufficiently that they can be removed (a very painless procedure).
Usually, the implant is given a period of three to six months to osseointegrate (fuse) with the patient’s jawbone before it’s restored (Step 13). This will, however, vary on a case-by-case basis (see below).
d) Some implant protocols require two separate surgeries.
In some cases, a patient’s implant procedure will require two separate surgical procedures.
The first surgery.
The initial surgery involves the placement of the dental implant itself as we have just described, with the exception that the gum tissue flaps are put back in place in a fashion where they completely cover over both the jawbone and the dental implant.
The second surgery.
A very minor procedure is then performed after the healing (osseointegration) of the dental implant has taken place. The purpose of this surgery is to trim back the gum tissue so the implant’s healing cap is exposed (so it can later be removed and a final dental restoration placed).
Step 13 – Surgical site healing. / Implant osseointegration.
How much healing time is needed?
The timing can vary.
When making a determination about the needed healing time frame, the dentist will take into consideration the type of bone in which the implant has been placed (both bone quality and quantity), the implant’s size, and other factors such as the type of surface treatment the implant may have received during its manufacturing process.
Why is a waiting period needed?
The reason that a waiting period is usually required is based on the following.
If the implant is placed under a load while its healing process is taking place, any resulting implant movement can cause the formation of a fibrous tissue encapsulation of the implant, thus interfering with osseointegration (implant-to-bone fusion).
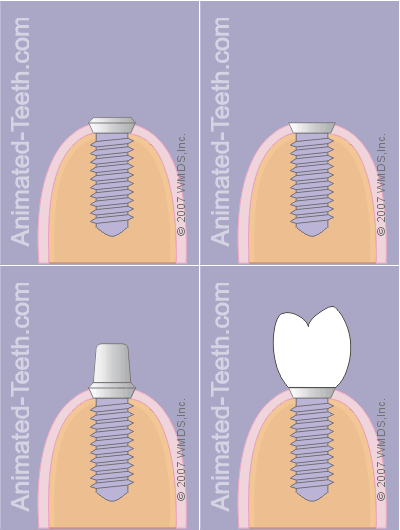
Placement of a crown on an implant.
Placement of a temporary restoration may be possible.
- The implant must have good primary stability (is anchored firmly in the bone at the time it is initially placed).
- The temporary dental restoration must be designed where the level of chewing forces it transfers to the implant are not greater than what its primary stability (stability before osseointegration has occurred) can withstand. (So no implant movement takes place.)
Step 14 – Placing the implant’s permanent dental prosthesis.
Once an adequate healing period has elapsed, the implant can have its final dental restoration fabricated and placed. This might be a dental crown, bridge or denture.
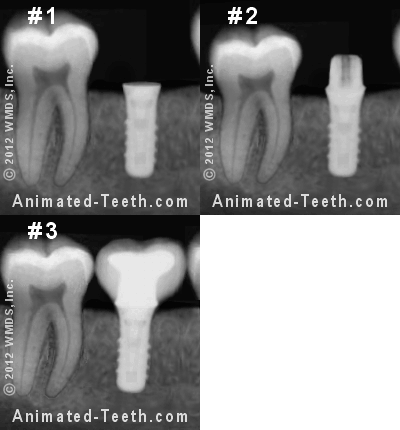
Stages of restoring an implant.
- Stage #1 – The implant has osseointegrated and is ready to be restored.
- Stage #2 – The implant’s abutment has been screwed into place.
- Stage #3 – A dental crown has been fabricated and cemented over the abutment. This patient’s treatment is now complete.
